How Amazon’s Logistics Keep It Ahead of the Competition – A Seller’s Perspective

When people think about Amazon’s dominance in eCommerce, they usually point to:

  • Fast shipping
  • Low prices
  • Massive product selection

But the real engine behind Amazon’s success is logistics — the intricate, efficient, and scalable system powering every delivery, every ranking algorithm, and every customer experience.

In this post, we’ll break down:
✅ How Amazon’s logistics ecosystem works
✅ What it means for third-party sellers
✅ Why FBA matters (and when it can be a limitation)
✅ How to use logistics as a strategic weapon — not just a cost center


🚚 Inside Amazon’s Logistics Engine

Amazon has built one of the largest logistics networks in the world, including:

  • Fulfillment centers (FCs) – store and ship inventory
  • Sortation centers – organize packages by zip code
  • Delivery stations – handle last-mile delivery
  • Amazon Air – cargo planes for next-day delivery
  • AMZL (Amazon Logistics) – their own delivery drivers

Together, this enables:

  • 1–2 day Prime shipping
  • National coverage with regional efficiency
  • Predictive placement of inventory based on demand

This scale is incredibly hard to replicate — and it’s Amazon’s true moat.


🛒 How This Impacts Sales & Conversion

Amazon’s algorithm rewards:
✅ Fast delivery
✅ Consistent availability
✅ High customer satisfaction

Products that are FBA-fulfilled (and Prime-eligible):

  • Win the Buy Box more often
  • Convert better due to trust + speed
  • Rank higher due to velocity and customer metrics

Simply put: better logistics = better ranking = more sales.


📦 Why FBA Is a Game-Changer for Sellers

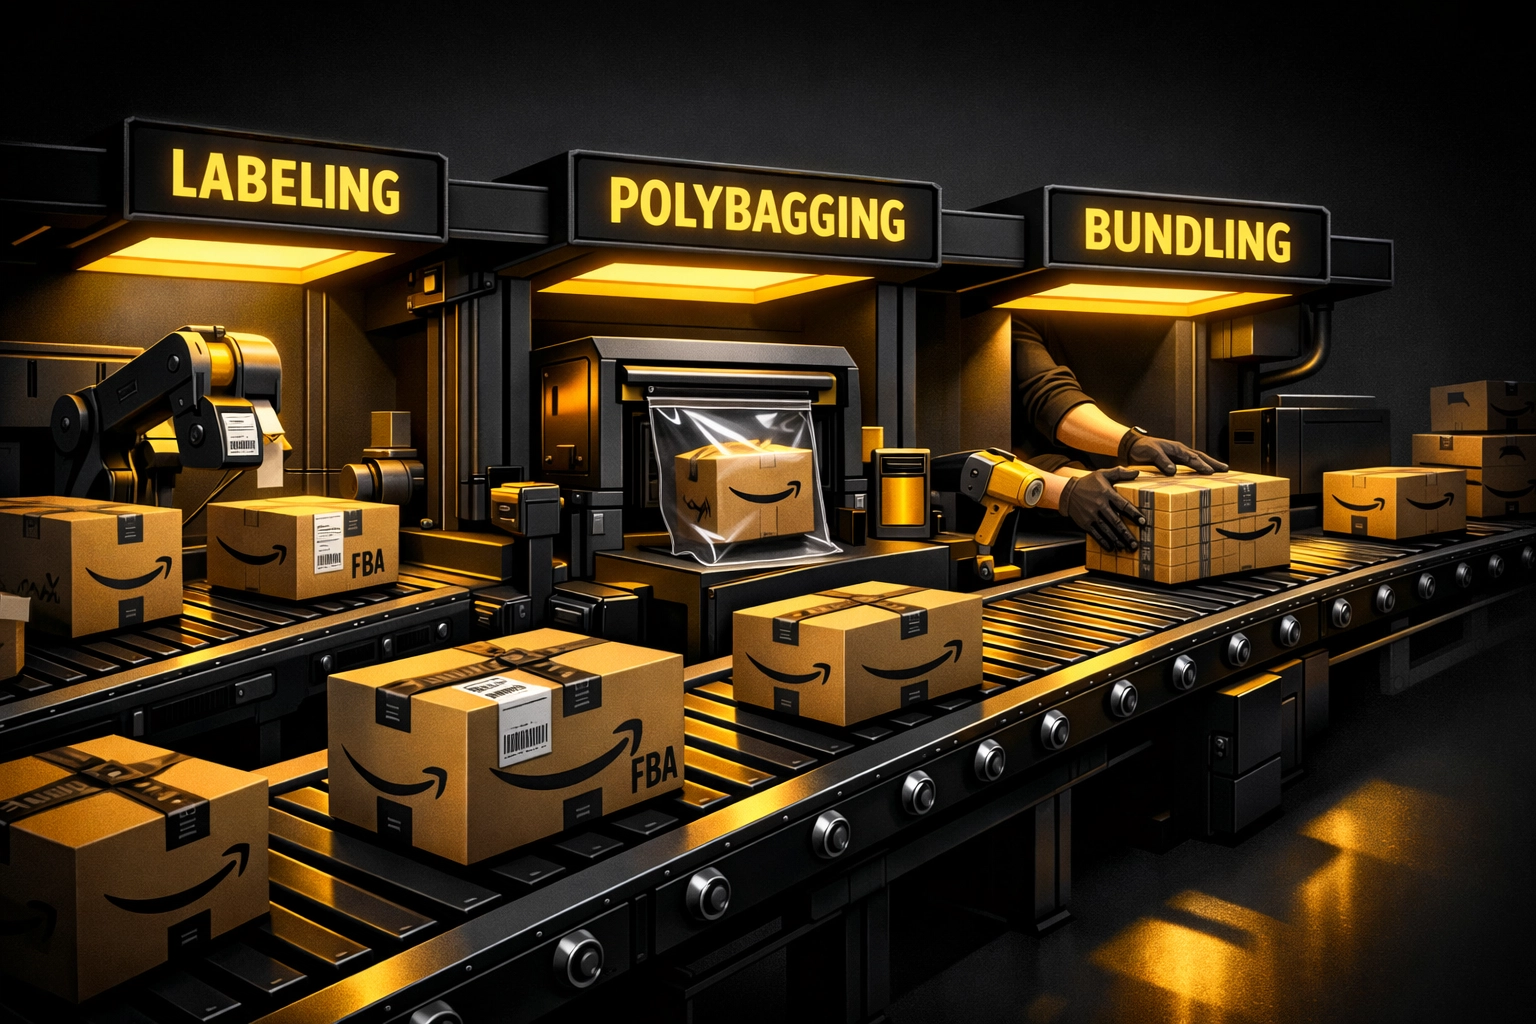
For 3P sellers, Fulfillment by Amazon (FBA) means:

  • Prepping inventory once, then letting Amazon do the rest
  • Automatic Prime eligibility
  • Access to Amazon’s returns, customer service, and shipping support

And crucially: You can compete with household brands — if your fulfillment matches theirs.


🧠 But There Are Limits…

FBA isn’t perfect.

Sellers need to watch out for:

  • Storage limits
  • Aged inventory fees
  • Unpredictable restock limits
  • Loss of brand control (no custom packaging, limited unboxing experience)

For some DTC brands, FBA is a launchpad — not a forever home.

That’s where 3PLs like Marketplace Valet come in — helping sellers scale beyond FBA by offering:
✅ Multi-channel fulfillment
✅ Branded packaging
✅ Bulk inventory control with Amazon replenishment


🛠️ How Sellers Can Leverage Amazon’s Logistics (Smartly)

  1. Start with FBA – Leverage their trust + speed
  2. Segment SKUs – Keep high-velocity items in FBA, low-turnover at 3PL
  3. Use FBA as a sales tool – Let it build momentum and rank
  4. Invest in parallel systems – Prepare for off-Amazon channels and multi-channel demand

🔄 FBA vs. FBM – What the Data Shows

MetricFBAFBM
Prime eligible✅ Yes❌ Unless SFP-qualified
Buy Box %✅ Higher❌ Lower (unless cheaper)
Conversion rate✅ 10–30% higher (avg)❌ Lower unless niche
Setup difficulty✅ Plug-and-play❌ Requires full ops setup
Branding control❌ None✅ Full control

🧠 Final Thoughts: Logistics = Your Secret Weapon

Whether you’re just launching or scaling past 8 figures, logistics isn’t just a backend function — it’s a frontline growth driver.

If you ignore it, you’re leaving money (and momentum) on the table.

✅ Use Amazon’s logistics to accelerate early growth
✅ Know when to bring in a partner to scale smarter
✅ Understand what Amazon rewards — and why logistics is always part of the equation

Amazon SEO Guide – Improve Search Rank and Drive Growth in 2025

Amazon SEO is one of the most powerful growth levers in your business — and also one of the most misunderstood.

Most sellers think SEO stops at stuffing keywords into a title.
But in reality, Amazon’s A10 algorithm evaluates relevance, performance, and shopper engagement across your entire listing and brand.

In this guide, we’ll walk through how to optimize your listings to:
✅ Rank higher in search
✅ Get more organic traffic
✅ Drive long-term growth (without blowing your ad budget)


🔍 What Is Amazon SEO?

Amazon SEO is the process of improving your product listing to rank higher in Amazon’s search results, so more customers can find and buy your product — organically.

It involves:

  • Keyword research
  • Listing optimization
  • Back-end data fields
  • Conversion and engagement signals

🧠 How the A10 Algorithm Works

Amazon’s A10 algorithm looks at:

  • Relevance – Are your keywords aligned with shopper intent?
  • Performance – Do your listings convert?
  • Engagement – Do customers click, stay, and buy?
  • Sales history – Is this product gaining momentum?

A10 is smarter than A9 — it’s not just about matching keywords, but ranking listings that shoppers interact with.


📈 Step 1: Keyword Research

Use tools like:

  • Helium 10 – Cerebro, Magnet
  • DataDive – Keyword clustering
  • Amazon Brand Analytics – Search Query Performance
  • Google Keyword Planner (for external insight)

Target:

  • High relevance + medium volume
  • Long-tail variations
  • Phrases with buying intent

📌 Build a keyword list with tiers:

  • Tier 1 = Primary keywords (title)
  • Tier 2 = Supporting (bullets & description)
  • Tier 3 = Backend terms & PPC discovery

✍️ Step 2: Listing Optimization

✅ Title (Biggest SEO impact)

  • Start with your primary keyword
  • Include brand + benefit or feature
  • Keep under 200 characters (or follow category limits)

Example:
“Stainless Steel Camping Cookware Set – Lightweight, Non-Stick – Includes Pot, Pan & Carry Bag”


✅ Bullet Points

  • Focus on benefits, not just features
  • Use secondary keywords naturally
  • Structure for scannability (capitalized headers + details)

✅ Product Description / A+ Content

  • Reinforce keywords in narrative form
  • Add emotion, use cases, storytelling
  • Use comparison charts and modules in A+ to drive engagement

✅ Backend Search Terms

  • Add alternate keywords, common misspellings, Spanish phrases
  • Don’t repeat words already in the title
  • Max out the 249 byte limit

🧪 Step 3: Conversion Boosting for SEO

SEO doesn’t stop at keywords — you need conversions to rank.

Optimize:

  • Main image – High-quality, zoomable, scroll-stopping
  • Price – Competitive and psychologically appealing
  • Reviews – Build early social proof (aim for 20+ reviews quickly)
  • Shipping – Use Prime or fast shipping badges if possible

The more conversions per impression = higher rank.


🛠️ Step 4: Track Performance & Iterate

Use:

  • Search Query Performance Report – See keyword impressions, clicks, and conversions
  • Helium 10 Keyword Tracker – Monitor keyword rank over time
  • Business Reports – Monitor Unit Session % (your conversion rate)

Review performance weekly and optimize:

  • Swap out underperforming bullets
  • Test new main images
  • Refresh titles with new top-converting terms

⚠️ Amazon SEO Mistakes to Avoid

❌ Keyword stuffing
❌ Ignoring backend terms
❌ Using low-quality images
❌ Not tracking keyword rank
❌ Writing for bots instead of humans


🔁 SEO + Ads = The Ultimate Combo

PPC helps you:

  • Rank faster on target keywords
  • Discover new converting terms
  • Boost early momentum for SEO

But your organic listing still does the heavy lifting long-term.
SEO + PPC = sales now + sales later


Final Thoughts

SEO is not a one-time task — it’s a growth system.

✅ Start with solid keyword research
✅ Write listings that rank and convert
✅ Track and test regularly
✅ Pair it with smart PPC

That’s how you build long-term sales — and reduce dependency on ads.

ICAP Flow – The Seller’s Anthem for Impressions to Purchases

If your Amazon sales aren’t where they should be, it’s not enough to just “optimize ads” or “fix your listing.”
You need a clear framework to know where in your funnel the breakdown is happening.

That’s where the ICAP Flow comes in.
It’s the cleanest, clearest way to turn:

📉 Weak traffic → Targeted impressions
👀 Views → Clicks
🛒 Clicks → Add-to-Carts
💳 Carts → Purchases

Let’s break it down.


🔁 What Is the ICAP Flow?

ICAP stands for:

  • I = Impressions
  • C = Clicks
  • A = Add-to-Carts
  • P = Purchases

Each stage tells you:

  • How well your ads or organic listings are performing
  • Where customers are dropping off
  • What to fix to increase sales

ICAP = the Amazon funnel in its simplest, most actionable form.


📊 Step-by-Step Breakdown


I – Impressions

Are people seeing your product?

If not, ask:

  • Are your keywords indexed?
  • Are your ad campaigns live and targeting the right terms?
  • Is your product suppressed?

Fixes:
✔️ Improve keyword coverage
✔️ Add more relevant PPC campaigns
✔️ Check listing suppression or stranded status


C – Clicks (CTR)

Are people clicking on your product?

If not:

  • Your main image might be weak
  • Your title might be unclear
  • Your price could be scaring people off

Fixes:
✔️ Test a stronger main image
✔️ Rewrite the title with outcome-driven language
✔️ Compare your price with top 3 competitors

Benchmark: Aim for 0.3%–0.5%+ CTR


A – Add-to-Carts (ATC Rate)

Are people considering buying?

If you’re getting clicks but no carts:

  • You’re not building trust
  • Your offer isn’t strong enough
  • They may be price shopping or getting confused

Fixes:
✔️ Strengthen your bullet points and A+ content
✔️ Add value props: warranty, bundle, reviews
✔️ Improve perceived quality with social proof and visuals

Benchmark: ~15–25% of clicks should lead to cart adds


P – Purchases (CVR)

Are people finishing the sale?

If carts don’t turn into purchases:

  • You might have a shipping issue
  • People may get distracted or second-guess
  • Pricing or reviews may not hold up

Fixes:
✔️ Enable Prime or fast shipping
✔️ Use pricing psychology (e.g. $24.99 instead of $26)
✔️ Request reviews to build conversion trust
✔️ Follow up with remarketing if using DSP

Benchmark: ~10–20% cart-to-purchase rate


📈 Real-World ICAP Use Case

One seller had strong impressions and clicks… but no sales.

We ran their ICAP:

  • ✅ I = 20,000/month
  • ✅ C = 300 (CTR = 1.5%)
  • ❌ A = 10 (only 3.3% ATC)
  • ❌ P = 3 (CVR = 30% from cart, but too few carts)

The problem wasn’t traffic — it was the offer.

We:

  • Rewrote bullet points
  • Added A+ content
  • Switched to a 2-pack bundle
  • Highlighted a free replacement guarantee

Results?
Carts jumped by 6x, sales followed.


🛠️ Tools to Measure ICAP

  • Search Query Performance (Brand Analytics)
  • Business Reports (Unit Session % = CVR)
  • PPC Reports (Impressions + Clicks)
  • Tools like Helium 10 or DataDive

Track weekly. Compare with prior periods. Look for drops or spikes.


🎯 Final Thoughts: Use ICAP to Scale Smarter

Don’t just ask “why aren’t my sales better?”
Ask:
✅ Am I getting impressions?
✅ Are people clicking?
✅ Are they adding to cart?
✅ Are they checking out?

If any stage breaks — fix that stage first.
That’s how pros scale.

Dayparting PPC Guide – The Amazon Advertising Hack That Saves You Money

Most Amazon sellers run their ads 24/7 — and they’re throwing away money every single night.

Why?
Because not all hours convert equally.

In this guide, I’ll show you how to use dayparting — a powerful Amazon PPC technique — to schedule your ads during peak hours and pause them during low-converting periods.

This is one of the most underrated strategies for sellers looking to improve ACoS, reduce waste, and scale smarter.


🧠 What Is Dayparting?

Dayparting = setting specific times of day for your ads to run.

It’s about showing up when your ideal customers are:
✅ Awake
✅ Shopping
✅ Ready to buy

And turning your ads off when they’re:
❌ Sleeping
❌ Browsing casually
❌ Not converting


📉 Why 24/7 Ads = Wasted Spend

Let’s say your product sells best between 7am and 9pm EST.

But your ads run all night long.
You’re still paying for clicks at 2am… but conversions are near zero. That means your ACoS goes up and your ROAS tanks — even if your product is great.

With dayparting, you can:
✅ Lower your total spend
✅ Maintain or increase total sales
✅ Improve overall efficiency


🛠️ How to Implement Dayparting on Amazon

🔹 Option 1: Use Third-Party Software

Amazon doesn’t offer native dayparting… yet. But tools like:

  • Perpetua
  • Downstream
  • Quartile
  • Pacvue
  • M19

…allow you to set schedules for ad campaigns and even automate based on historical data.

📌 Most let you run campaigns only during top-performing hours (e.g. 7am–10pm), and pause overnight or on low-performing days.


🔹 Option 2: Manual Dayparting (Budget Pausing)

If you’re not using software, try this:

  • Run your ads with daily budgets
  • Manually pause/unpause campaigns based on performance
  • Check reports to identify your strongest hours (via Amazon Advertising Reports or third-party tracking)

It’s not fully automated — but it’s a great low-cost way to test.


⏰ How to Identify Your Best Hours

Look at:

  • Search Term Reports (performance by time-of-day, if your tool allows it)
  • Conversion window trends (when your ACoS is lowest)
  • External behavior (e.g., B2B products = weekday AM, impulse buys = nights/weekends)

Common patterns:

  • Consumer products: 7am–10pm local time
  • Niche/high-priced items: 10am–5pm (business hours)
  • Kids/household items: 8pm–11pm (post-dinner scroll zone)

🔄 When to Turn Ads OFF

  • Between 11pm and 6am in your target customer’s time zone
  • During lunch hours or dead midday stretches (if data supports it)
  • On weekends (for B2B) or Mondays (for low-conversion trends)

📉 Turning ads off during bad hours lets you consolidate budget into your best hours = more impressions + conversions when it matters.


📈 Real Seller Example:

A mid-size CPG brand using Perpetua implemented dayparting:

  • Ads paused from 1am to 7am
  • Daily budget stayed the same
  • ACoS dropped by 24%
  • Clicks dropped 8%, but conversions held steady
  • Overall ROAS improved by 31%

🧠 Bonus Tip: Use Dayparting with Bid Adjustments

Combine dayparting with dynamic bidding (down only or fixed) during weaker hours.
Also test different:

  • Keyword match types during peak times
  • Ad creatives for nighttime vs. daytime users (if using Sponsored Brands)

🛑 Common Dayparting Mistakes

❌ Turning ads off too early without enough data
❌ Pausing profitable late-night or early AM traffic
❌ Forgetting to sync campaigns to your customer’s timezone, not your own
❌ Trying to daypart when you’re still under 10 orders/day


✅ When NOT to Daypart

  • If your product sells well 24/7 (ex: urgent health or consumables)
  • If you have low ad data and are still learning
  • If you run Sponsored Display (which performs differently by hour)

Test first — then scale.


Final Thoughts:

Dayparting is a high-leverage PPC hack that puts your budget where it performs best.

You don’t need more traffic.
You need better-timed traffic that converts.

✅ Use software if possible
✅ Start with light testing (pause nights, track results)
✅ Build smarter ad schedules as you scale

How to Deal with Amazon Hijackers and Knockoff Sellers — A Complete Brand Protection Guide

If you’ve been selling on Amazon long enough, you’ll eventually face it:
A hijacker jumps on your listing, undercuts your price, and ships a fake version of your product to your customers.

It’s frustrating. It’s harmful. And if you don’t act fast, it can tank your:

  • Star rating
  • Sales velocity
  • Organic rank
  • Brand reputation

In this guide, I’ll show you exactly how to deal with Amazon hijackers and knockoff sellers — and how to protect yourself before it happens again.


🕵️‍♂️ What Is an Amazon Hijacker?

A hijacker is an unauthorized seller who lists their product on your ASIN (typically FBA or FBM) and pretends to sell your product — often a counterfeit, gray-market, or returned item.

They:

  • Undercut your price to win the Buy Box
  • Ship fake or low-quality versions
  • Damage your product reviews
  • Confuse your customers
  • Trigger returns and listing suspensions

⚠️ Signs You’ve Been Hijacked

  • The Buy Box is rotating or gone
  • You see 1-star reviews about “wrong product” or “cheap copy”
  • Your sales have slowed down
  • Seller Central shows other sellers on your ASIN

🔍 Step-by-Step: How to Deal With a Hijacker

✅ Step 1: Confirm It’s a Hijacker

Search your product’s ASIN on Amazon.

  • Are there other sellers listed?
  • Are they FBM or FBA sellers not affiliated with you?
  • Are they selling at a significantly lower price?

If yes — you’ve been hijacked.


✅ Step 2: Purchase the Product from the Hijacker

Order it directly from the other seller.
Document:

  • Order ID
  • Photos of the item you receive
  • Comparison to your real product
  • Packaging, branding, and UPC discrepancies

📸 These will be your proof for Amazon support.


✅ Step 3: Report the Seller via Brand Registry

If you’re Brand Registered, use the Report a Violation (RAV) tool.

Steps:

  1. Go to Brand Registry → Report Infringement
  2. Submit the ASIN, seller name, and proof
  3. Include order ID and photos
  4. State that this is a counterfeit or misrepresented item

Amazon typically removes the hijacker within 48–72 hours if the evidence is strong.


✅ Step 4: Escalate if Needed

If Brand Registry doesn’t act, escalate:

  • Use the “Contact Us” form under Products & Inventory → Report a Violation
  • Email notice-dispute@amazon.com with all your proof
  • Attach invoice or GS1 certificate if UPC is being misused

🛡️ How to Prevent Hijackers in the Future

🔐 1. Enroll in Amazon Transparency

  • Serial-number based authentication
  • Only you can sell units with valid codes
  • Hijackers can’t pass the check = auto blocked

🧾 2. Use GS1-Certified UPCs

Avoid using reused or discounted barcodes.
GS1 links your brand name to your product and prevents catalog tampering.

🛍️ 3. Monitor Listings with Alerts

Use tools like:

  • Helium 10 Alerts
  • Bindwise
  • AMZAlert

These notify you as soon as another seller jumps on your ASIN.

⚖️ 4. Use IP Protection Services

Some sellers take it further with legal partners:

  • Cease & desist letters
  • DMCA takedown notices
  • Brand gating (for larger brands)

✅ What NOT to Do

❌ Don’t price match the hijacker — they win the race to the bottom
❌ Don’t ignore it — 1-star reviews can pile up quickly
❌ Don’t expect Amazon to know they’re fake — you must report it


Final Thoughts: Be Proactive, Not Reactive

Amazon hijackers don’t care about your brand — they care about exploiting your success.

✅ Report violators quickly
✅ Use Brand Registry + Transparency
✅ Document everything
✅ Monitor your listings every week

If you stay vigilant, you can keep your listings clean — and your customers happy.

The Best PPC Strategy for New Amazon Product Launches (2025 Edition)

Launching a new product on Amazon is exciting — and risky.

You’ve got your listing, your inventory, and your expectations. But without a dialed-in PPC strategy, most launches fail to gain traction — or worse, they burn through ad budgets without any real momentum.

In this guide, we’ll break down the best PPC strategy to:
✅ Generate real data fast
✅ Drive ranking for the right keywords
✅ Scale without overspending
✅ Turn traffic into traction


🚀 The Goal of a Launch PPC Strategy

At launch, your goals aren’t profit. Your goals are:

  • Sales velocity
  • Keyword rank
  • Data clarity (what’s working, what’s not)

You’re buying visibility. So your campaigns need to be clean, controlled, and strategic from Day 1.


🧱 The 3-Part PPC Launch Framework

1. Auto Campaign (Exploration Mode)

  • Set a tight budget ($10–$30/day)
  • Use low bids to discover converting search terms
  • Let Amazon’s algorithm gather data on your listing

📌 Use 1 ad group, 1 ASIN, and monitor search terms daily.


2. Manual – Exact Match Campaign (Top 5–10 Keywords)

  • Choose 5–10 high-relevance keywords using Helium 10, DataDive, or Brand Analytics
  • Bid aggressively on exact match to drive rank and sales velocity
  • Optimize based on ACOS and conversions over 7–10 days

📌 These are your “launch keywords.” Build organic rank here.


3. Product Targeting Campaign (Defensive + Offensive)

  • Target complementary ASINs and competitor listings
  • Helps get visibility in the “Compare With Similar Items” section
  • Great for new products with few reviews (steal their traffic!)

📌 Use strategic ASIN selection — don’t waste money on mega-competitors.


💸 Budget Allocation Strategy

Start with:

  • 50% to Exact Match
  • 30% to Auto
  • 20% to Product Targeting

This helps prioritize ranking keywords while still exploring new traffic paths.


🔄 What NOT to Do During a Launch

❌ Don’t launch with broad match
❌ Don’t run 10 campaigns before you have data
❌ Don’t let auto campaigns run wild — negate irrelevant terms
❌ Don’t expect profit in the first 2–4 weeks

Your goal is momentum, not margin.


📈 Week-by-Week Plan

Week 1–2:

  • Launch all 3 campaigns
  • Focus on CTR and conversion rate
  • Adjust bids every 3 days
  • Start negating irrelevant terms from Auto

Week 3–4:

  • Pause non-converting search terms
  • Double down on high-converting exact keywords
  • Add keyword winners from Auto → Exact campaigns
  • Expand ASIN targeting to new competitor listings

🧠 Bonus Tip: Pair With External Traffic

Use:

  • Amazon Attribution + influencer posts or email traffic
  • Brand referral bonus if applicable
  • Organic posts on Instagram, TikTok, or Meta Ads with Amazon destination URLs

This sends quality traffic → improves engagement → boosts organic rank.


📊 Track These Metrics

  • Click-through rate (CTR) — aim for 0.35%+
  • Conversion rate (CVR) — aim for 15–25%
  • ACoS — expected to be higher in launch (50–100% is common early on)
  • Impressions & rank position on top keywords

✅ The Payoff: Rank, Reviews, and Real Momentum

By Week 4, you should:

  • Know your converting keywords
  • Start ranking organically
  • Have early reviews
  • Be able to pause low-performing campaigns and scale what’s working

This is where the real growth begins.


Final Thoughts

The best PPC strategy for product launches isn’t complex — it’s disciplined.

✅ Start lean
✅ Target with intent
✅ Let the data lead
✅ Iterate weekly

Launching right sets the tone for long-term success.

This Amazon Trick Helps Sellers Increase Sales Fast (2025 Guide)

Most Amazon sellers focus on new product launches, more ads, or big pricing shifts to grow sales. But the truth is — sometimes the fastest wins come from small, strategic moves.

In this post, I’ll show you the one Amazon trick you can use right now to:

  • Increase your conversion rate
  • Improve your organic ranking
  • Boost sales — without launching or spending more

Let’s dive in.


💡 What’s the Trick?

Refresh your main image + first bullet point to align with shopper intent on your top-converting keyword.

It sounds simple. But when done right, this creates a massive lift in:
✅ Click-through rate (CTR)
✅ Conversion rate
✅ Session percentage
✅ Organic keyword rank


📦 Why This Works (According to the Algorithm)

Amazon’s A10 algorithm rewards:

  • Relevance
  • Engagement (clicks and conversions)
  • Shopper experience

By syncing your main image (visual hook) and first bullet (value prop) with the actual keyword driving your best traffic, you instantly make your listing more attractive — and more persuasive — to the people already searching.


📊 Case Study: One Small Change = Big Impact

A private label skincare brand did the following:

  • Identified their top-converting keyword via Brand Analytics
  • Updated their main image to show the result (clear skin, not just packaging)
  • Rewrote their first bullet point to say: “Designed for dry, sensitive skin — dermatologist-approved formula soothes in 24 hours”

Within 10 days:

  • CTR improved by 37%
  • Conversion rate jumped from 22% to 29%
  • Organic rank moved from position 12 to position 5

🛠️ How to Apply This Trick Step-by-Step

Step 1: Find Your Top-Converting Keyword

Use:

  • Brand Analytics (Search Query Performance report)
  • Helium 10 / DataDive
  • Ad reports (look for keywords with high CVR)

Choose a keyword with:

  • Good volume
  • High conversion rate
  • Relevance to your product’s core benefit

Step 2: Align Your Main Image to the Shopper’s Mindset

If the keyword is “non-slip yoga mat,” show:
❌ Not just a mat on a white background
✅ A person in motion, using the mat in a high-sweat position (action, outcome)

Use contrast, angles, and lighting to stop the scroll.


Step 3: Rewrite Your First Bullet Point

Start with a benefit that matches the search intent:

“Built for active yoga — non-slip surface stays grippy, even during hot yoga sessions.”

Avoid fluff like:

  • “High quality material”
  • “Great for everyone”
  • “Easy to use”

Give specific outcomes based on the keyword.


Step 4: Monitor Results Over 7–14 Days

Track:

  • CTR in your ad reports or Brand Analytics
  • CVR in Business Reports or SQP
  • Keyword rank using Helium 10 or DataDive

If performance improves, you’re on the right track. If not — test again.


🧠 Bonus Variations on This Trick

Want to go deeper? Try:

  • Updating your A+ content headline to match the top keyword
  • Running an exact match PPC campaign just on that term
  • Adding one high-impact image to your 2nd photo slot that reinforces the same value

📈 The Real Power of This Tactic

This isn’t just a “quick fix.”
It’s a conversion amplifier that makes all your traffic — organic and paid — work harder for you.

And it costs you nothing.

✅ No new inventory
✅ No new ads
✅ Just a smarter message


Final Thoughts

Small, intentional tweaks = big, scalable results.
If you’re already getting traffic and some conversions, this is the trick that helps you turn the dial way up.

Want help running the test?

High Sales, Low Clicks? Here’s What You’re Missing on Amazon

At first glance, high sales with low clicks might look like a success.

But it’s a hidden performance issue that could be limiting your growth — especially when it comes to Amazon’s algorithm, long-term visibility, and ad efficiency.

In this post, we’ll break down:
✅ What causes this pattern
✅ Why it matters
✅ How to fix it (without killing your conversion rate)
✅ What the best sellers are doing differently


📉 What “Low Clicks, High Sales” Looks Like

You check your data:

  • Low click-through rate (CTR) on ads or organic impressions
  • High conversion rate once someone lands on your detail page
  • Your sales look solid… but they could be better

This is common with:

  • Listings that rank well but don’t stand out
  • Ad campaigns with great targeting but weak creative
  • Products with niche demand but poor thumbnail performance

🧠 Why This Is a Problem

1. You’re Missing Traffic That Could Be Converting

If 100 people click and 20 buy = 20% CVR
But if 1,000 people saw your listing but skipped it = lost potential

Amazon’s algorithm loves clicks that lead to conversions.
Low CTR tells the algorithm: “This listing isn’t relevant,” even if people who click DO buy.


2. It Drains Your Ad Budget

If your Sponsored Product ad has a low CTR:

  • Your CPC goes up
  • Your impressions go down
  • You end up paying more for fewer results

Amazon rewards engaging ads, not just converting ones.


3. It Slows Down Organic Ranking Momentum

CTR is part of the A10 algorithm’s “engagement score.”
If people aren’t clicking your listing, it can:

  • Stall your keyword rank
  • Get you bumped by more eye-catching competitors
  • Lower your featured offer visibility

🛠️ What Causes Low Clicks?

🔹 Weak Main Image

If your main image doesn’t stop the scroll, you’ll never get the chance to convert.

Look for:
✅ White space optimization
✅ Unique angles or packaging
✅ Product in use (if allowed)
✅ Zoom clarity and detail

🔹 Boring or Vague Title

Your title is your value prop.

  • Lead with benefits, not just keywords
  • Use numbers, solutions, or outcomes (“Lasts 6 Months” vs. “Filter Cartridge”)
  • Cut fluff (don’t waste characters on “amazing quality”)

🔹 Price Mismatch

Is your product priced right for its category?
Too high = friction
Too low = perceived cheapness

Look at your top 3 competitors and adjust accordingly.

🔹 Poor Ad Creative (for SB, SD)

Sponsored Brand and Display ads need real creative.
Don’t use generic headlines. Show bundles, value, or emotion.


🧪 How to Diagnose It

Use:

  • Brand Analytics CTR report
  • Search Query Performance (SQP)
  • Helium 10 or DataDive click and conversion data
  • Sponsored Ads → Targeting → CTR% per keyword

Look at:

  • Keywords with high impressions but low CTR
  • Listing images that underperform in split testing
  • Ad campaigns with high spend but few clicks

✅ How to Fix It (Without Killing Conversions)

1. Split Test Your Main Image

Use Amazon Experiments or PickFu to test:

  • Alternate angles
  • Lifestyle overlays
  • Visuals with callouts or text (for off-Amazon ads)

2. Refresh Your Title

Use the “scroll test.” Ask:

  • Would this title stop YOU?
  • Does it explain what the product does?

Front-load the benefit. Make it a headline.

3. Run Keyword-Specific Ads

Use Sponsored Product Exact Match campaigns to isolate high-converting but low-click terms.

Then optimize listings based on those keywords.

4. Improve Ad Creatives

For Sponsored Brand and Display:

  • Use lifestyle images
  • Add short, bold copy
  • Show the product in use, especially in carousel formats

📈 The Payoff: High Clicks + High Conversions

When you align:
✅ High CTR
✅ Strong CVR
✅ Relevant keywords
✅ Engaging creative

…Amazon rewards you with:
📈 Better rankings
💰 Cheaper ad clicks
🚀 Faster growth


Final Thoughts

High sales with low clicks is a sign of untapped potential.
The good news? You’re already doing something right — your product converts.

Now, it’s time to:
🔧 Fix your creative
📷 Upgrade your images
🧠 Align your price and title
🚀 Capture the traffic you’re missing

How to Fix Amazon Error Code 8541 — A Simple Guide for Sellers

Running into Amazon’s Error Code 8541 can be incredibly frustrating.
Whether you’re launching a new product or updating an existing listing, this error usually means Amazon’s catalog doesn’t like the data you’ve submitted — and you’ll need to make some adjustments to move forward.

In this guide, we’ll explain:

  • What Error 8541 means
  • Why it happens
  • How to fix it step-by-step
  • How to prevent it from happening again

🔍 What Is Error Code 8541?

Error 8541 is Amazon’s way of telling you that your listing submission failed because the product information you’re submitting doesn’t match an existing ASIN — or Amazon believes there’s a conflict.

It often pops up when:

  • You’re trying to create a new listing
  • You’re updating a listing tied to a shared ASIN
  • Amazon thinks your product already exists in the catalog, but the data doesn’t align

This usually relates to title, brand, category, product ID (UPC, EAN), or variation structure mismatches.


⚠️ Common Triggers for Error 8541

  • Using a UPC that already exists in Amazon’s system with a different brand or title
  • Uploading data for a product that Amazon already mapped to a different ASIN
  • Trying to change core attributes (brand, title, item_type) on a locked ASIN
  • Submitting mismatched variation relationships (parent-child issues)
  • Using the wrong category template for a flat file upload

🛠️ Step-by-Step: How to Fix Error Code 8541

✅ Step 1: Identify the Source of the Conflict

Start by:

  • Copying your product ID (UPC or EAN)
  • Searching it on Amazon
  • Finding what ASIN it’s currently tied to (if any)

Then compare your listing info to what Amazon already shows.

Are there brand or title mismatches?
Does the ASIN use your product ID but under a different brand?


✅ Step 2: Use a Flat File Template to Resubmit the Correct Data

Flat files give you more control than the Seller Central UI.

  • Go to Add Products via Upload > Download Template
  • Choose the correct category
  • Fill out key fields: SKU, product ID, brand, title, item type
  • Use Update in the “Update/Delete” column
  • Submit under Check & Upload > Upload Your Inventory File

Watch the processing report carefully — it’ll tell you if the error persists.


✅ Step 3: Open a Case with Seller Support (If Needed)

If the flat file fails again, open a support case:

Contact Path:
Help > Get Support > Selling on Amazon > Products and Inventory > Fix a Product Page

Include:

  • The ASIN or SKU
  • Full explanation of the issue
  • Proof of your product’s correct attributes (manufacturer’s link, packaging photo, GS1 certificate, etc.)
  • Flat file CSV as an attachment

Ask for a “catalog team escalation” to resolve conflicting ASIN data.


✅ Step 4: Request a Listing Attribute Update or Merge

In some cases, Amazon may require you to:

  • Submit a Listing Attribute Change request
  • Merge listings or provide additional brand authorization

You may need to verify:

  • Brand ownership
  • GS1 barcode registration
  • Images of your product packaging and UPC

Be polite, persistent, and document everything.


🧠 Pro Tip: Prevent Future Errors

  • Use GS1 barcodes registered to your brand
  • Always search for your product ID before uploading
  • Avoid reusing SKUs from old products
  • Never try to change core listing attributes via the UI — use flat files
  • Monitor your Listing Quality Dashboard in Seller Central regularly

✅ Final Thoughts

Amazon Error Code 8541 is fixable — but it can slow you down and cost you sales if left unresolved.

If you’re stuck:
✅ Identify the conflicting ASIN
✅ Use a clean flat file
✅ Escalate with proof
✅ Don’t give up — Seller Support can resolve it with enough documentation

How This Amazon Seller Fought Counterfeiters After Hitting Best Seller — And What You Can Learn From It

You work hard. You launch your product. You rank.
Then you finally see that golden badge: Amazon Best Seller.

And that’s exactly when the vultures come.

This is the true story of how one Amazon seller was hit by counterfeiters after reaching the top spot — and the tactical steps they took to recover, protect their brand, and keep growing.


🏆 The Success — And Then the Hijack

The seller had a private label kitchen product.
After 6 months of solid PPC, great reviews, and consistent inventory, they hit #1 in their subcategory.

Then within a week:

  • Sales slowed
  • Bad reviews appeared (“cheap version,” “not as described”)
  • The Buy Box was flipping to other sellers
  • Amazon’s algorithm started downgrading the listing

They had been hijacked.


💀 What Is a Hijacker or Counterfeiter?

On Amazon, a hijacker is a seller that jumps on your listing with a fake or counterfeit version of your product.

They piggyback your hard work:

  • Use your ASIN
  • Offer a knockoff version
  • Undercut your price
  • Destroy your reputation

Amazon assumes it’s the same product unless you prove otherwise.


🔍 How They Found Out

The seller:

  • Saw multiple unknown sellers in the “Other Sellers on Amazon” section
  • Noticed Buy Box loss even while in stock
  • Got reviews describing a completely different product
  • Ordered the knockoff themselves (mismatched branding + low quality)

⚠️ The Immediate Impact

  • 4.8-star rating dropped to 3.9 in 10 days
  • Daily revenue fell by 50%
  • Amazon began suppressing the listing due to “inconsistent customer experience”
  • Organic rank dropped from #1 to #6

🔒 How They Fought Back

✅ Step 1: Enroll in Brand Registry (If Not Already)

  • Trademark registered with USPTO
  • Enrolled in Brand Registry 2.0
  • Gained access to tools like Report a Violation, Transparency, and Project Zero

✅ Step 2: Buy the Counterfeit Product

  • Ordered directly from each hijacker’s seller profile
  • Took high-res photos comparing original vs. fake
  • Documented packaging, branding, materials

✅ Step 3: File Brand Registry Complaints

Used the Report a Violation (RAV) tool:

  • Submitted side-by-side image comparisons
  • Listed affected ASINs, seller names, and order IDs
  • Wrote detailed explanations of why the product was not authentic

Amazon removed 3 of the 4 hijackers within 48 hours.


✅ Step 4: Secure the Buy Box with FBA + Pricing

  • Ensured FBA inventory was prioritized
  • Matched MAP pricing (to avoid undercutting signals)
  • Enabled “Sell Globally” to prevent cross-region hijacks

✅ Step 5: Enroll in Amazon Transparency (Optional)

They opted in for future protection.

Transparency uses unique product-level QR codes to validate authenticity.
Only you (the brand owner) can sell that ASIN — even if others have inventory.


🧠 Optional (But Powerful) Actions

🔹 Send Cease & Desist Letters

Using IP attorney or template tools like IP Accelerator.

🔹 Engage Amazon’s Escalation Path

If normal support fails, escalate to Brand Registry or “Report Infringement” via email.

🔹 File Infringement Complaints

If hijackers keep reappearing, go straight to IP infringement complaint under your registered trademark.


🛡️ How They Recovered

  • Reviews recovered after fake sellers were removed
  • Seller support flagged previous bad reviews as “not relevant to product”
  • Sales bounced back within 3 weeks
  • Transparency codes added to packaging
  • Reclaimed Best Seller badge 6 weeks later

✅ What You Can Learn

1. Brand Registry is Your First Line of Defense

No trademark = no power to fight back.

2. Monitor Your Listings Weekly

Use tools like Helium 10’s Alerts, Bindwise, or manually check Buy Box ownership.

3. Keep Branded Packaging and Photos Handy

You’ll need it for proof in a hijack case.

4. Act Fast

The longer hijackers are live, the more they hurt your rank and reviews.


Final Thoughts: Growth Attracts Risk

The better your product does, the more it becomes a target.
But you don’t have to be a victim.

✅ Get your trademark
✅ Register your brand
✅ Watch your Buy Box
✅ Document everything
✅ Fight smart — and don’t let counterfeiters steal what you built