You've optimized your titles. You've packed your bullet points with keywords. Your backend search terms are pristine. Sales bumped up… then plateaued.
Sound familiar?
Here's what's happening: Basic listing optimization gets you in the game, but brand management is what actually scales your revenue. And in 2026, with Amazon's algorithm rewarding conversion rates more than ever, understanding this distinction isn't just helpful: it's the difference between a $50K/month listing and a $250K/month listing.
Let's break down both strategies, show you exactly where each one wins, and reveal which approach actually moves the needle for long-term revenue growth.
What Basic Listing Optimization Actually Does (And Where It Falls Short)
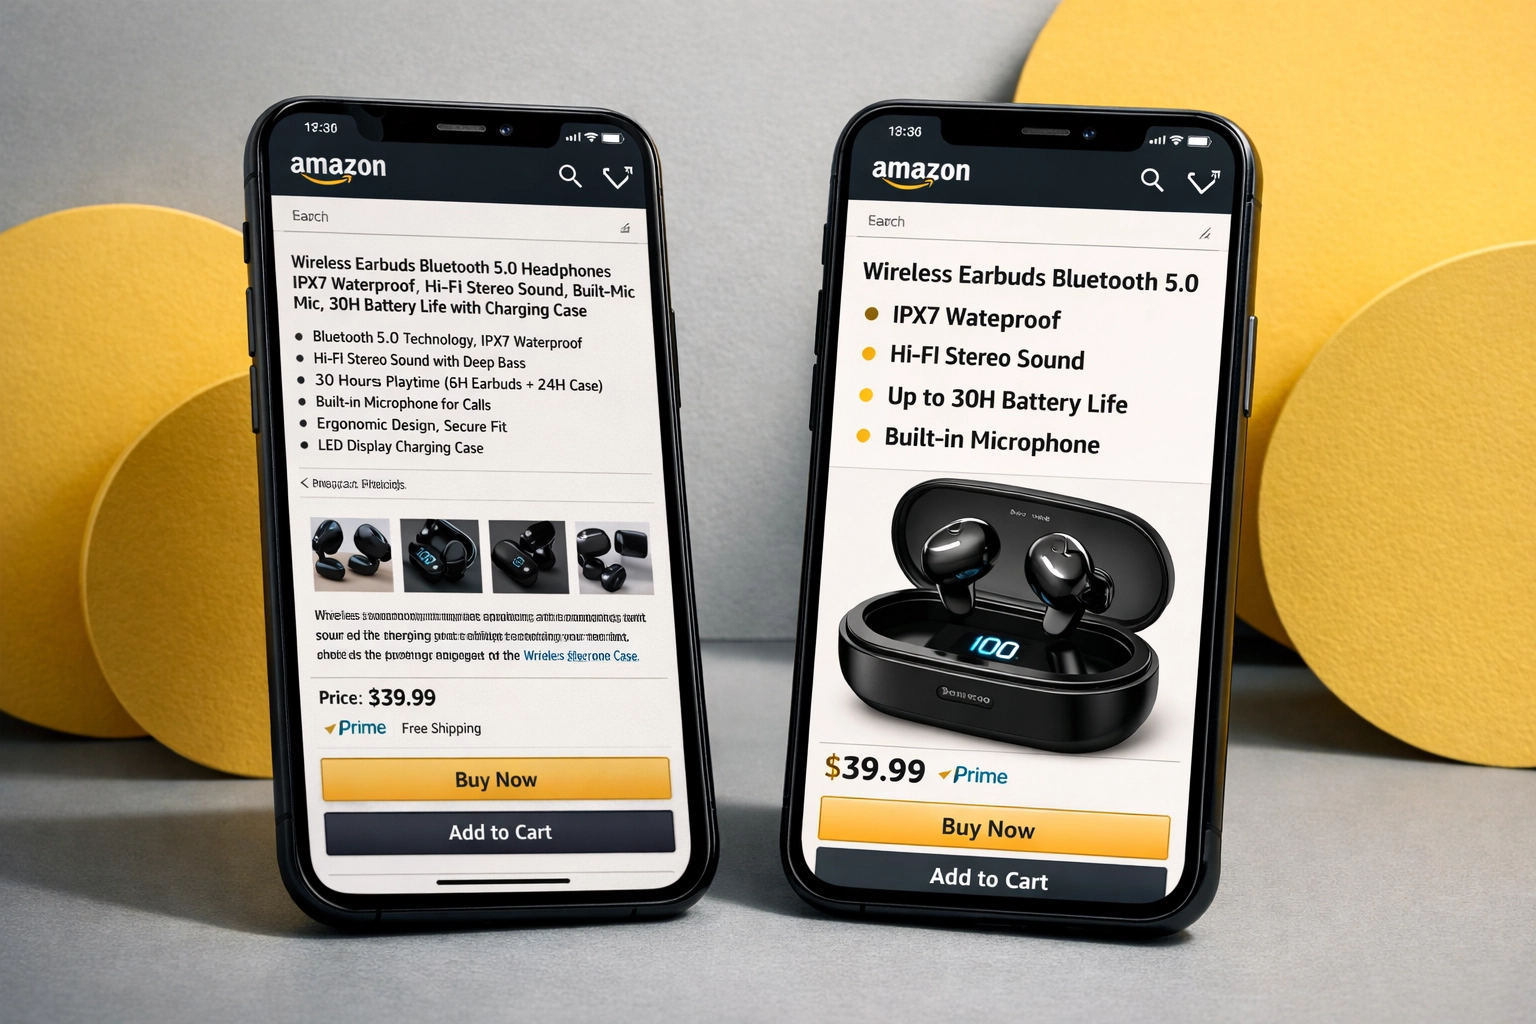
Basic listing optimization is your foundation. It's the TFSD framework: Title, Features, Search Terms, Description. This approach focuses on making your product findable through Amazon's A10 algorithm.
The core elements:
- Title optimization: Front-loading primary keywords while staying under 200 bytes
- Keyword-rich bullet points: Features that read naturally but hit search terms
- Strategic backend search terms: No redundancy, maximum relevance
- CTR improvement: Making your main image and title compelling enough to click
Here's the thing: basic optimization typically delivers a 20-50% sales boost when done correctly. That's nothing to sneeze at. You're improving your visibility, catching more search traffic, and presenting your product in a way that drives clicks.
But here's where it hits the wall:
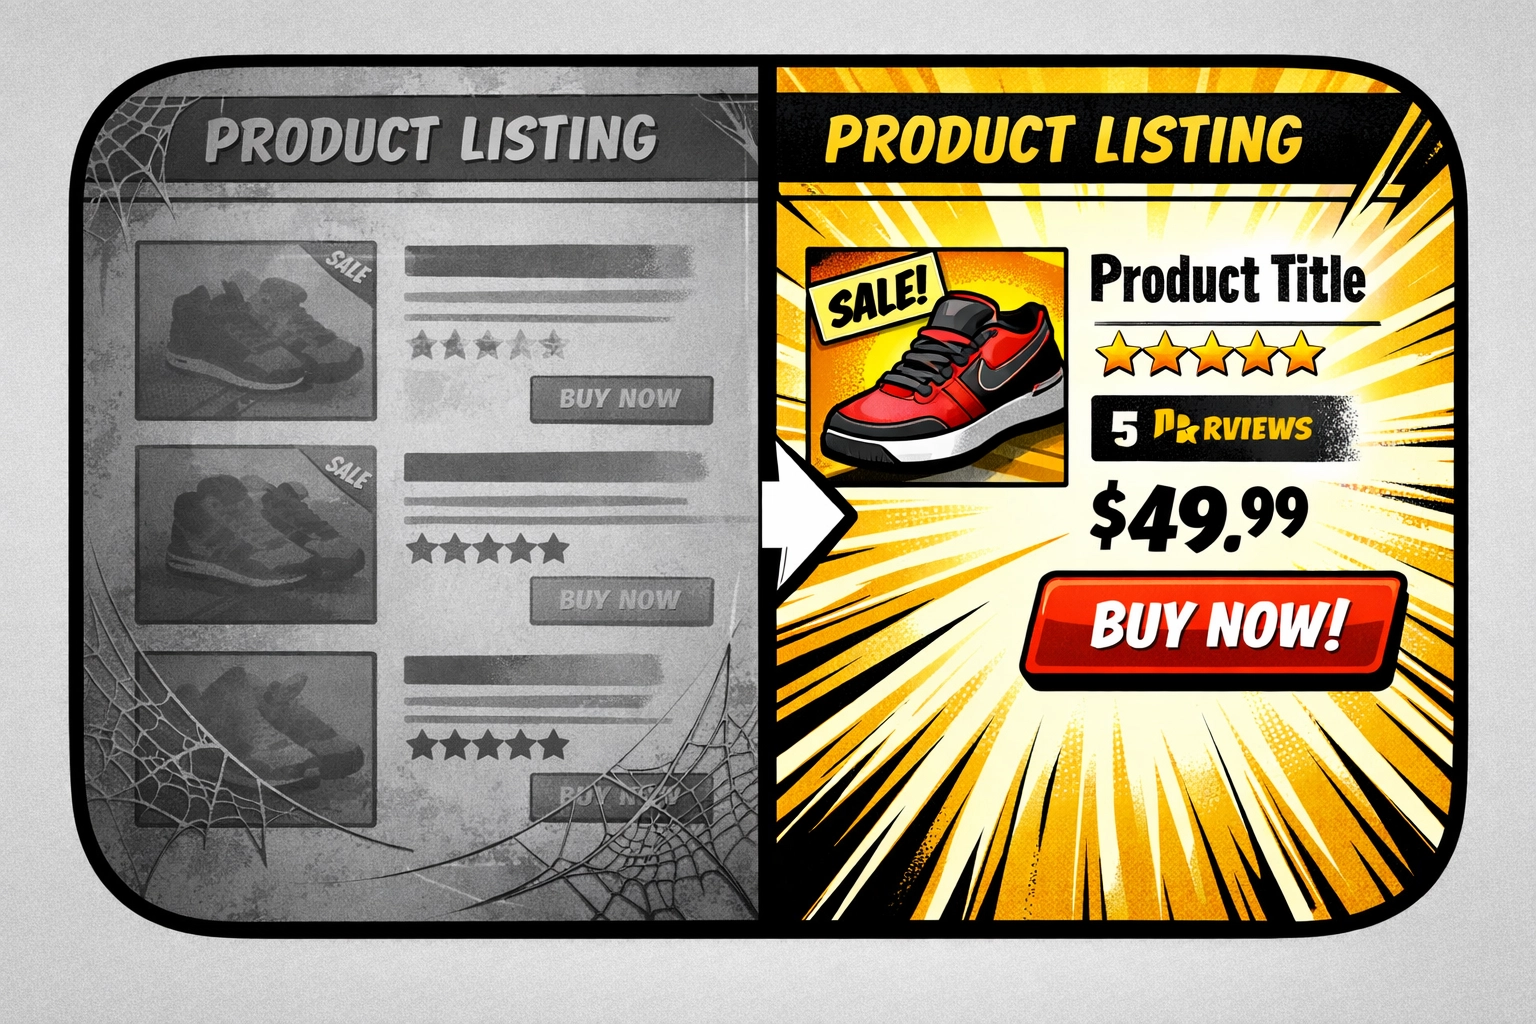
Basic optimization addresses findability and initial appeal. It doesn't solve the trust problem. It doesn't build desire beyond feature lists. And it definitely doesn't maximize conversion once a customer lands on your page.
Think about it: A keyword-optimized title gets them to your listing. A decent main image gets them to click. But what makes them scroll past your competitor's identical product and actually hit "Add to Cart"?
That's where most sellers get stuck. They've done everything "right" according to basic optimization best practices, yet their conversion rates stay flat. The traffic is there. The product is solid. But something's missing.
Why Brand Management Is the Revenue Scaling Multiplier
Brand management isn't just "making things look pretty." When you register your brand and leverage A+ Content (Enhanced Brand Content), you're fundamentally changing how Amazon's algorithm views your product: and how customers respond to it.
Here's what brand management actually unlocks:
1. Conversion Power That Basic Optimization Can't Touch
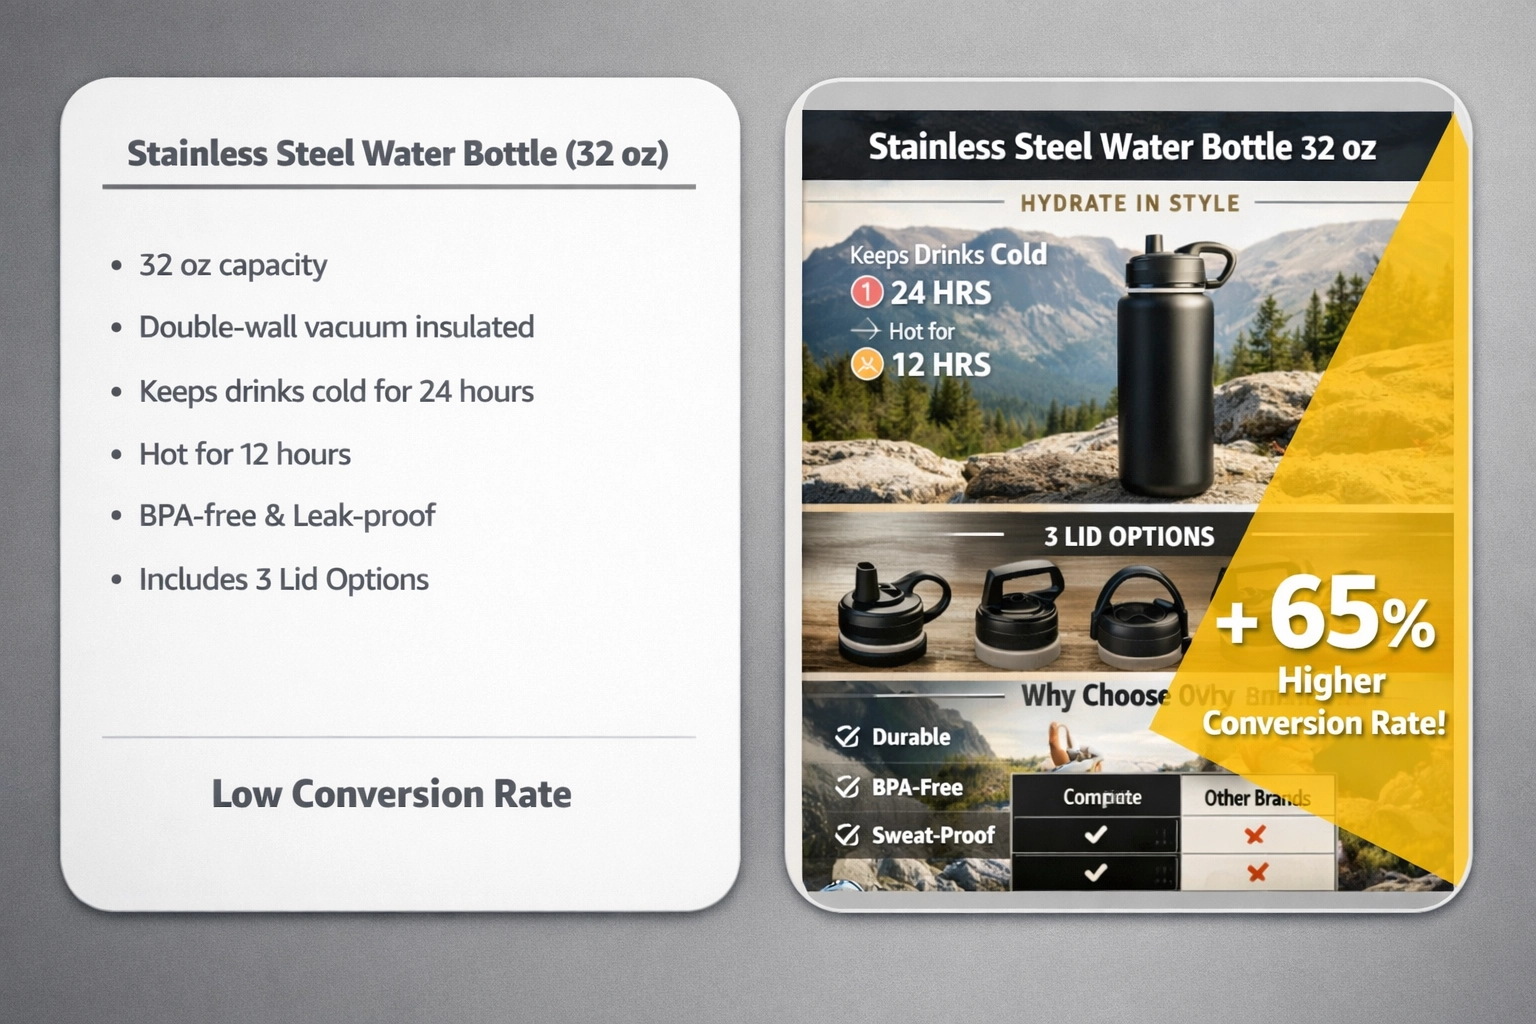
A+ Content replaces those plain-text bullet points with rich visual sections, comparison charts, lifestyle imagery, and brand storytelling. This isn't superficial: it's psychological.
When customers see professional brand presentation:
- They trust what they're buying
- They understand the value proposition instantly
- They feel confident enough to complete the purchase
- They connect with your brand, not just your product
Basic optimization might get you a 15% conversion rate. Brand management pushes that to 20-25%. That 5-10 percentage point difference? At scale, that's an extra $100K+ in annual revenue on the same traffic.
2. The Algorithmic Advantage Nobody Talks About
Here's what Amazon doesn't advertise: The algorithm rewards products that convert.
When your A+ Content reduces hesitation and increases conversion rates, Amazon's A10 algorithm interprets this as a quality signal. Your product deserves higher organic placement. Higher placement means more traffic. More traffic at better conversion rates means even more sales.
It's a compounding loop:
- Better conversion → Better organic ranking
- Better ranking → More traffic
- More traffic + high conversion → Reduced ad spend dependency
- Lower ACoS → Better profitability

You can't create this loop with basic optimization alone. You need the conversion rate boost that brand management provides.
3. Differentiation in a Sea of Identical Third-Party Sellers
Let's be real: Most products on Amazon have multiple sellers listing the exact same item. Basic optimization doesn't differentiate you: everyone can optimize titles and bullet points.
Brand management creates a moat. When you have Brand Registry and A+ Content, you're not just another seller duplicating product specs. You're building:
- Visual brand identity that stands out
- A brand narrative customers remember
- Cross-selling opportunities within your catalog
- Customer lifetime value beyond a single purchase
This is especially critical if you're working with an amazon brand management partner who understands how to leverage these tools strategically.
The 2026 Reality: You Need Both, But One Scales Better
Here's the nuanced answer nobody wants to hear: You can't choose one or the other if you're serious about scaling.
Basic optimization is your prerequisite. Without it, you won't get traffic in the first place. But treating it as your only strategy? That's leaving 60-70% of your revenue potential on the table.
The scaling hierarchy looks like this:
Phase 1: Basic Optimization (Months 1-3)
- Get your TFSD framework dialed in
- Achieve baseline visibility
- Generate initial reviews and sales velocity
- Understand which keywords actually convert
Phase 2: Brand Management Layer (Months 4-6)
- Register your brand
- Deploy A+ Content strategically
- Build trust signals that improve conversion
- Reduce reliance on paid ads as organic ranking improves
Phase 3: Continuous Optimization (Ongoing)
- Test A+ Content variations
- Refine based on conversion data
- Expand brand presence across catalog
- Scale what's working

If you already have decent traffic and reviews but sales have plateaued, brand management is your unlock. The conversion rate improvement will signal to Amazon that your product deserves better placement, creating that compounding growth loop.
If you're just starting and have zero traffic, focus on basic optimization first. You can't convert visitors you don't have.
What Most Sellers Get Wrong (And How to Avoid It)
The research shows that most sellers never test or optimize their listings effectively: even when they have good products and decent traffic. They set up their listings once and hope for the best.
Here's what that looks like in practice:
❌ Treating A+ Content as "nice to have": It's not decoration. It's a conversion tool that directly impacts your algorithm performance.
❌ Stopping at basic optimization: You've built the foundation but never added the house.
❌ Not measuring conversion rate impact: If you don't track how changes affect conversion, you're flying blind.
❌ Ignoring the compound effect: Brand management improvements stack over time as the algorithm rewards your conversion rates.
✅ The right approach? Treat basic optimization as your baseline and brand management as your growth investment. One gets you in the game; the other wins it.
Which Strategy Actually Scales Revenue in 2026?
Short answer: Brand management scales revenue. Basic optimization enables it.
Longer answer: If you're measuring pure scaling potential: the ability to compound growth over time: brand management wins because it creates algorithmic favor through improved conversion rates. Every sale becomes easier to generate because Amazon progressively shows your product to more people.
Basic optimization plateaus. You hit a ceiling on how much you can improve findability through keywords alone. There's only so much you can do with a title and bullet points.
But brand management? The ceiling is much higher. Professional brand storytelling, visual hierarchy, trust-building elements: these factors multiply your existing traffic's value.
For sellers serious about scaling in 2026:
- If you're doing under $50K/month: Master basic optimization first, then layer in brand management
- If you're doing $50K-$150K/month: Brand management is your next growth lever
- If you're doing $150K+/month: You should already be deep into amazon brand management strategies or working with an amazon agency that specializes in conversion-focused brand building
The sellers who treat brand management as optional are the same sellers wondering why their sales flatline despite "doing everything right." The sellers who understand it as their scaling multiplier? They're the ones compounding revenue year over year.
The Bottom Line
Basic listing optimization is essential. You can't skip it. But in 2026, with Amazon's algorithm prioritizing conversion rates and customer experience more than ever, brand management is what separates good sellers from great ones.
You need both. But if you're asking which strategy actually scales revenue? Brand management creates the compound growth loop that basic optimization simply can't match.
Want help implementing both strategies effectively? That's exactly what we do at Marketplace Valet. Whether you need full amazon account management services or specialized amazon listing optimization paired with strategic brand management, we've got you covered.
The question isn't whether to optimize or build your brand. It's whether you're ready to stop plateauing and start scaling.