How to Effectively Use Amazon Sponsored Brands as a Third-Party Seller

Amazon Sponsored Brands are an invaluable tool for third-party sellers looking to enhance their brand presence and drive more sales on Amazon. By featuring your brand logo, a custom headline, and multiple products, Sponsored Brands ads can appear in search results, making them a powerful way to connect with shoppers. This comprehensive guide will walk you through setting up and optimizing Sponsored Brands campaigns step by step.

Understanding Amazon Sponsored Brands

Sponsored Brands (formerly known as Headline Search Ads) are cost-per-click (CPC) ads that allow sellers to promote their brand and product portfolio above, below, and alongside search results. These ads are designed to increase brand awareness and product visibility, making them an excellent choice for sellers with multiple products and an established Amazon brand.

Key Benefits:

  • Increased Visibility: Sponsored Brands help your products stand out in a crowded marketplace.
  • Brand Recognition: Ads include your brand logo and a custom headline, which can help increase brand loyalty.
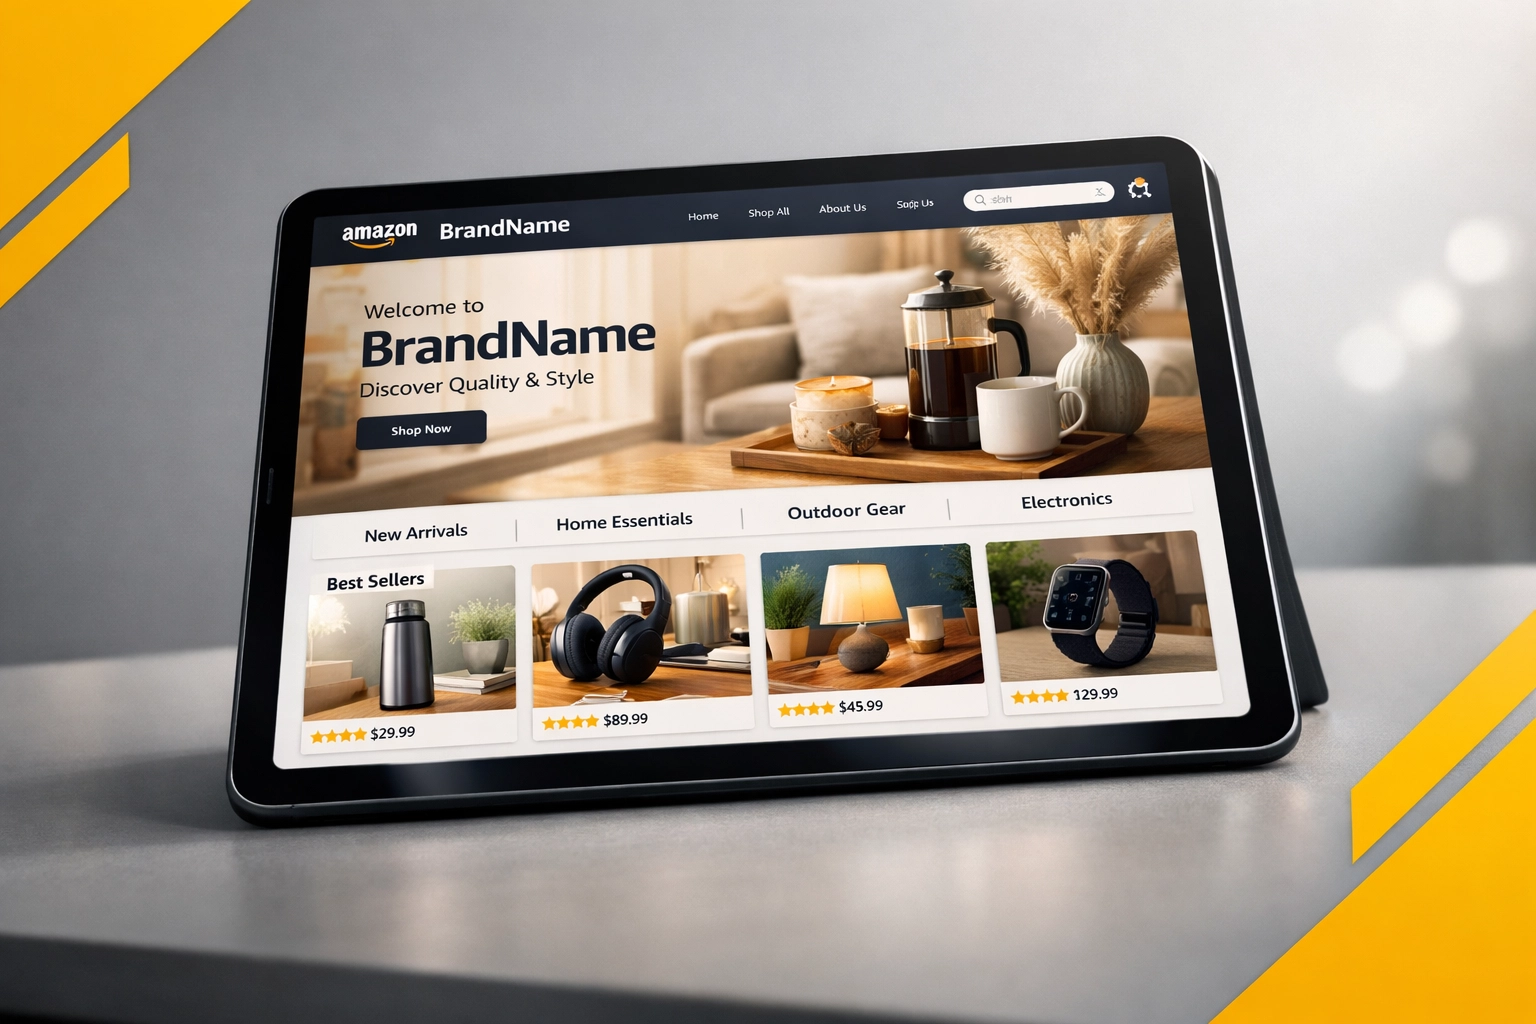
  • Direct Traffic: You can direct shoppers to your custom Amazon Store or a curated page that showcases your products.

Step-by-Step Guide to Setting Up Sponsored Brands

Step 1: Eligibility and Requirements

To use Sponsored Brands, you must be enrolled in the Amazon Brand Registry, have an active registered trademark, and sell products as a professional seller.

Step 2: Campaign Setup

Log in to your Amazon Seller Central account and navigate to the Campaign Manager under the advertising tab. Choose ‘Sponsored Brands’ and click ‘Create Campaign’.

Campaign Details:

  • Name Your Campaign: Choose a name that easily identifies your campaign for future reference.
  • Set Your Budget: Decide on a daily or monthly budget. Remember, Amazon will not exceed this amount.
  • Campaign Duration: You can set specific start and end dates or opt to run the campaign indefinitely.

Step 3: Choose Your Ad Format

Amazon offers different ad formats for Sponsored Brands, including product collection ads, store spotlight ads, and video ads. Select the format that best fits your advertising strategy.

Step 4: Build Your Ad

  • Select Your Products: Choose up to three products you want to advertise.
  • Craft Your Headline: Create a compelling headline that highlights your brand message or value proposition.
  • Upload Your Logo: Ensure your brand logo is clear and meets Amazon’s image requirements.

Step 5: Targeting

Choose between keyword targeting or product targeting. Keyword targeting allows you to show your ads to customers searching for similar products, while product targeting enables you to target shoppers viewing products similar to yours.

Step 6: Set Bids

Decide how much you are willing to pay per click. You can use automatic bidding (where Amazon optimizes bids for you) or manual bidding (where you control the bid amounts).

Step 7: Launch and Monitor Your Campaign

Once everything is set, launch your campaign. Regular monitoring and adjusting are crucial. Utilize Amazon’s reporting tools to track performance metrics like impressions, clicks, spend, sales, and ACoS (Advertising Cost of Sale).

Optimizing Your Sponsored Brands Campaigns

  • Optimize Keywords and Bids: Regularly review your keyword performance and adjust bids accordingly to maximize your ROI.
  • Refine Your Creative: Test different headlines and images to determine what resonates best with your target audience.
  • Utilize Seasonal Opportunities: Capitalize on peak shopping times by adjusting your campaigns to highlight relevant products.

Conclusion

Amazon Sponsored Brands are a dynamic advertising solution that can significantly enhance your visibility and sales on Amazon. By understanding how to effectively set up and manage these campaigns, you can ensure your products capture the attention of potential buyers right when they are ready to make a purchase. Remember, the key to success with Amazon advertising lies in continuous testing, monitoring, and optimization to align with shopper behaviors and market trends.

The Complete Guide to Amazon Sponsored Products for Third-Party Sellers

Navigating the realm of Amazon’s marketplace can be daunting for third-party sellers looking to boost their visibility and sales. One of the most effective tools at your disposal is Amazon Sponsored Products, a powerful advertising program that helps sellers promote their individual product listings directly where customers will see them. This comprehensive guide will walk you through each step of setting up and optimizing Amazon Sponsored Products, ensuring you maximize your return on investment.

What Are Amazon Sponsored Products?

Amazon Sponsored Products are ads for individual product listings on Amazon. These ads help improve the visibility of your products by appearing in search results and on product pages, thus driving more traffic to your listings. Sponsored Products operate on a pay-per-click (PPC) model, meaning you only pay when a shopper clicks on your ad.

Benefits of Using Amazon Sponsored Products

  • Increased Visibility: Your products appear higher in search results and on competitor product pages.
  • Targeted Reach: Ads are shown to customers who are actively looking to buy, based on the keywords or products they’re searching.
  • Controlled Costs: You control how much you spend by setting your budget and choosing how much to bid per click.
  • Detailed Metrics: Amazon provides insights into how your ads are performing, allowing you to adjust strategies accordingly.

Step-by-Step Guide to Setting Up Amazon Sponsored Products

Step 1: Choose Your Products

Select products that you believe will benefit most from advertising. Focus on those with the best potential for high conversion rates, such as your best sellers or those with competitive prices and excellent reviews.

Step 2: Create Your Campaign

Log into your Seller Central account and navigate to the advertising section to start a new campaign. You’ll need to:

  • Name Your Campaign: Choose a clear and descriptive name that you can easily recognize.
  • Set a Budget: Decide on a daily budget to control how much you spend on ads each day.
  • Choose a Duration: Set start and end dates for your campaign or leave it open-ended.

Step 3: Target Your Ads

You have two targeting options:

  • Automatic Targeting: Amazon targets your ads based on keywords and products similar to yours. This is great for beginners.
  • Manual Targeting: You choose the keywords or products to target. This option gives you more control and is better for experienced sellers.

Step 4: Choose Your Keywords

If you opt for manual targeting, select keywords that are relevant to your products. You can use tools like Google Keyword Planner or Amazon’s own search terms report to find effective keywords.

Step 5: Set Your Bids

Decide how much you are willing to pay for a click on each keyword. You can set a default bid for all keywords or customize bids for individual keywords based on their potential to drive sales.

Step 6: Create Your Ad

Amazon automatically generates the ad content from the product listing you choose to promote. Ensure that your product listing is optimized with high-quality images and detailed, persuasive product descriptions.

Step 7: Launch and Monitor Your Campaign

Once everything is set up, launch your campaign. Regularly check the performance in your campaign manager and adjust your strategies as necessary. Key metrics to monitor include:

  • Click-through rate (CTR)
  • Cost per click (CPC)
  • Advertising cost of sales (ACoS)
  • Total sales resulting from the ad

Best Practices for Optimizing Your Sponsored Products Ads

  • Optimize Product Listings: Before you spend money on ads, make sure your product listings are optimized. This means professional images, compelling product features, and clear descriptions.
  • Regularly Refresh Keywords: Update your keywords periodically based on performance data and market trends.
  • Adjust Bids According to Performance: Increase bids on high-performing keywords and reduce them on those that aren’t delivering results.
  • Use Negative Keywords: To avoid unnecessary costs, add negative keywords that will prevent your ad from showing up in irrelevant searches.

Conclusion

Amazon Sponsored Products can significantly enhance your product visibility and sales on Amazon if used correctly. By following this step-by-step guide and adhering to best practices, you can efficiently manage your PPC campaigns and achieve a substantial return on investment. Remember, success in Amazon advertising is about continuous learning and adjustment—stay proactive and keep optimizing your strategies.

Optimizing Amazon PPC Campaigns for Better ROI: A Comprehensive Guide for Third-Party Sellers

As a third-party seller on Amazon, leveraging Pay-Per-Click (PPC) advertising through Amazon’s Seller Central can be a game-changer for your business. However, to truly benefit from Amazon PPC, you need to optimize your campaigns strategically to enhance your Return on Investment (ROI). This detailed guide will walk you through the process of refining your PPC strategies to maximize efficiency and profitability.

Understanding Amazon PPC

Before diving into optimization techniques, it’s crucial to understand the basics of Amazon PPC. PPC campaigns on Amazon operate on a bid-based system, where sellers pay a fee each time a shopper clicks on their ad. These ads can appear in prominent spots on Amazon’s search results pages or on product pages, providing significant visibility.

Types of Amazon PPC Campaigns:

  • Sponsored Products: Promote individual listings and appear directly in search results and on product pages.
  • Sponsored Brands: Highlight your brand and portfolio of products above, below, and alongside search results.
  • Sponsored Display: Target customers both on and off Amazon based on their shopping behaviors.

Step-by-Step Optimization Strategies

Step 1: Keyword Optimization

Keywords are the cornerstone of any successful PPC campaign. Optimizing your keywords ensures that your ads reach a relevant audience.

  • Research Keywords: Use tools like Amazon’s own Keyword Planner, Helium 10, or Jungle Scout to find high-volume keywords related to your products.
  • Implement Keyword Match Types: Amazon offers three match types: broad, phrase, and exact. Use a mix of these to balance reach and relevance.
  • Negative Keywords: Regularly update negative keywords to exclude irrelevant traffic and reduce wasted spend.

Step 2: Refine Your Bidding Strategy

Effective bidding strategies can significantly affect your PPC campaign’s success by influencing how often your ads are shown.

  • Dynamic Bidding: Amazon’s dynamic bidding strategies adjust your bids in real-time based on the likelihood of a sale. Options include ‘down only’, ‘up and down’, and ‘fixed’.
  • Adjust Bids by Placement: Analyze performance based on the placement of your ads (top of search, product pages) and adjust bids to optimize for the best-performing placements.

Step 3: Optimize Your Ad Content

The content of your ads plays a pivotal role in attracting clicks and converting prospects into buyers.

  • High-Quality Images: Ensure your ad images are clear, high-resolution, and relevant to the keywords.
  • Compelling Copy: Write concise, compelling ad copy that highlights the unique benefits of your products.
  • A/B Testing: Continuously test different headlines, descriptions, and images to determine what works best for your target audience.

Step 4: Use Advanced Targeting Options

Advanced targeting options allow you to refine your audience, ensuring that your ads are displayed to shoppers most likely to buy.

  • Product Targeting: Target specific products, categories, or brands that are similar or complementary to yours.
  • Demographic Targeting: Adjust your campaigns based on demographic data like age, gender, and household income if available.

Step 5: Monitor and Adjust Campaigns Regularly

Continuous monitoring and adjustment of your PPC campaigns are vital to improving performance and ROI.

  • Regular Reviews: Check your campaign performance daily or weekly to quickly identify and rectify underperforming ads.
  • Performance Metrics: Focus on key performance indicators such as ACoS (Advertising Cost of Sale), conversion rate, and CTR (Click-Through Rate).
  • Seasonal Adjustments: Modify your campaigns for seasonal trends and shopping events like Prime Day or Christmas to capitalize on increased traffic.

Conclusion

Optimizing Amazon PPC campaigns is an ongoing process that requires attention to detail, an understanding of Amazon’s complex platform, and a willingness to adapt strategies based on performance data. By following these steps, third-party sellers can improve their visibility on Amazon, attract more qualified traffic, and ultimately, enhance their ROI. Remember, the goal of PPC is not just to increase sales but to do so in a cost-effective manner that adds real value to your business.

The Ultimate Guide to Setting Up Amazon PPC Campaigns as a Third-Party Seller

In today’s fiercely competitive e-commerce landscape, Amazon Pay-Per-Click (PPC) campaigns stand out as a vital tool for third-party sellers aiming to enhance visibility and accelerate sales. Effective Amazon PPC management can catapult your products to the top of Amazon’s search results, significantly boosting your chances of attracting clicks and conversions. This comprehensive guide delves into how to set up, manage, and optimize your PPC campaigns within Amazon Seller Central.

Understanding Amazon PPC

Amazon PPC is an advertising platform that allows sellers to display their products prominently in Amazon search results and on product pages based on targeted keywords. You pay only when a potential customer clicks on your ad, hence the term “pay-per-click.”

Types of Amazon PPC Ads

  • Sponsored Products: These ads promote individual product listings and appear directly in search results and on product pages.
  • Sponsored Brands: Formerly known as Headline Search Ads, these ads help promote a brand and up to three of its products at the top of search results.
  • Sponsored Display: These ads appear on Amazon and external websites, targeting users based on previous interactions with your products.

Step 1: Setting Up Your PPC Campaigns

Choose the Right Campaign Type

Select a campaign type that aligns with your marketing objectives. For most sellers, Sponsored Products offer the best mix of visibility and control.

Organize Your Campaign Structure

Organizing your campaigns effectively is crucial for tracking performance and optimizing efficiently. Consider structuring your campaigns based on product categories, top sellers, seasonal promotions, or other strategic segments.

Step 2: Keyword Research

Keyword research is the backbone of effective PPC campaigns. Utilizing tools like Amazon’s Keyword Tool, Helium 10, or Jungle Scout can provide insights into high-volume search terms that are most relevant to your products.

  • Broad Match: Includes searches related to the keyword in any order, offering maximum visibility.
  • Phrase Match: Includes searches that contain the exact phrase or sequence.
  • Exact Match: Targets searches that match the keyword exactly, offering the highest relevance and often leading to better conversion rates.

Step 3: Setting Budgets and Bids

Determine your daily budget to control how much you spend on ads each day. Setting competitive bids for each keyword is crucial; bid too low, and your ads may not appear; bid too high, and you might exhaust your budget rapidly without sufficient return.

  • Automatic Targeting: Amazon targets ads based on your product information and relevant search terms. It’s a good way to start and gather data.
  • Manual Targeting: Gives you direct control over keywords and bids. Use the data from automatic campaigns to inform your manual strategy.

Step 4: Creating Compelling Ad Content

Your ad’s success isn’t just about visibility; it’s also about how compelling your ad is to potential customers. Ensure your product images are high-quality and your ad copy is clear, benefits-focused, and includes a strong call-to-action.

Step 5: Monitoring and Optimization

Regularly review the performance of your campaigns. Amazon provides detailed metrics within Seller Central that can help you understand your ads’ effectiveness, including click-through rates (CTR), conversion rates, cost per click (CPC), and advertising cost of sales (ACoS).

  • Optimize Continuously: Use the data to adjust your keywords, bids, and ad spend.
  • A/B Testing: Periodically test different images, titles, and pricing to see what resonates best with your audience.

Conclusion

Setting up Amazon PPC campaigns is a dynamic process that requires attention to detail, ongoing optimization, and a keen understanding of your target audience. By following these steps, you can create effective PPC campaigns that not only increase visibility but also drive sales and profitability. Remember, the world of Amazon is highly competitive, and the sellers who succeed are the ones who continually learn, adapt, and optimize their strategies to stand out in the marketplace.

Enhancing Your Amazon Presence: Leveraging Product Listing Optimization Tools

As a third-party seller on Amazon, mastering the art of product listing optimization is essential. The platform’s vast marketplace is highly competitive, making visibility and attractiveness of your listings crucial for success. This blog post provides a detailed guide on how to effectively use Amazon’s product listing optimization tools to improve your product visibility, enhance customer experience, and ultimately boost your sales.

Understanding Amazon’s Optimization Tools

Amazon offers a variety of tools designed to help sellers enhance their product listings. These tools are crucial for making your products more appealing to potential customers and improving their search visibility on the platform.

1. Keyword Optimization Tools

Keywords are the backbone of searchability on Amazon. Tools like Amazon Keyword Tool or third-party options such as Helium 10, Jungle Scout, and Ahrefs provide insights into the keywords customers are using to search for products like yours. These tools can help identify high-traffic keywords to incorporate into your product titles, descriptions, bullet points, and backend search terms.

2. A+ Content Manager

For brand-registered sellers, Amazon’s A+ Content feature allows you to enhance your product descriptions with rich text and images. This tool is instrumental in telling your brand story and highlighting product features in a visually appealing way that standard listings do not allow.

3. Amazon Advertising

Amazon Advertising offers tools to promote your products through sponsored ads, which can appear in search results and on product pages. Utilizing Amazon PPC (pay-per-click) campaigns allows you to increase visibility for your listings and drive more targeted traffic.

4. Brand Analytics

Amazon Brand Analytics provides valuable data for brand registered sellers, including information on search terms, demographics, and competitor analysis. This tool is essential for understanding market trends and optimizing your marketing strategy accordingly.

Step-by-Step Guide to Optimizing Your Listings

Step 1: Keyword Research and Implementation

Start by researching keywords that are relevant to your product. Incorporate these keywords into your product title, feature bullet points, description, and hidden keywords in the backend of your Amazon listing. Ensure the keywords are relevant and naturally integrated to avoid keyword stuffing, which can negatively impact your listing’s performance.

Step 2: Enhance Visual Content

Utilize high-quality images and videos in your listings. Amazon allows up to 7 images, including the main image. Make sure your images are clear, professionally shot, and highlight different aspects and uses of the product. Consider adding videos that demonstrate the product in action, which can significantly enhance conversion rates.

Step 3: Utilize A+ Content

Develop comprehensive A+ content that tells a compelling story about your product and brand. Use this feature to include detailed descriptions, comparison charts, and additional images. This enriched content not only helps in converting potential buyers but also improves customer satisfaction by providing more detailed information.

Step 4: Optimize Pricing Strategies

Keep your pricing competitive by monitoring market trends and competitor pricing. Tools like CamelCamelCamel or Keepa can track price fluctuations on Amazon, helping you adjust your pricing strategy dynamically to stay competitive while maximizing profits.

Step 5: Monitor Performance and Adjust

Regularly review your listing’s performance through Amazon’s Seller Central dashboard and the Brand Analytics tool. Pay attention to metrics such as click-through rates (CTR), conversion rates, and overall sales. Use this data to tweak your listings, adjust your advertising strategies, and refine your overall approach.

Common Pitfalls to Avoid

  • Overusing Keywords: While keywords are essential, overuse can make your content difficult to read and negatively impact customer experience.
  • Neglecting Mobile Optimization: Many users shop on mobile devices, so ensure your listings are optimized for mobile viewing.
  • Ignoring Customer Feedback: Regularly review customer feedback and address common concerns in your listings to improve product ratings and trust.

Conclusion

Effectively using Amazon’s listing optimization tools is crucial for standing out in a crowded marketplace. By strategically employing these tools and continuously monitoring and adjusting your approach, you can significantly improve your product visibility, enhance customer experience, and increase your sales. Remember, the key to success on Amazon is a combination of strategic optimization, ongoing testing, and adaptation to market changes.

Maximizing Your Amazon Success: A Deep Dive into the Product Listing Quality Dashboard

For third-party sellers on Amazon, understanding and maximizing the performance of product listings is crucial to success. Amazon’s Product Listing Quality Dashboard offers a powerful tool to help sellers enhance their listings and improve their overall performance on the platform. This comprehensive guide will explore how to effectively use this dashboard to optimize your listings and drive more sales.

What is the Product Listing Quality Dashboard?

Amazon’s Product Listing Quality Dashboard is designed to help sellers identify and resolve issues that might affect their product listings’ performance and customer experience. The dashboard provides actionable insights into various aspects of listing quality, including content, discoverability, and customer satisfaction. By leveraging this tool, sellers can ensure their listings meet Amazon’s high standards and are optimized for maximum visibility and conversion.

Accessing the Product Listing Quality Dashboard

To access the dashboard, you must have an Amazon Seller Central account. Once logged in, navigate to the ‘Performance’ menu and select ‘Listing Quality Dashboard.’ This will bring up a comprehensive overview of your listings and any recommended actions to improve them.

Key Features of the Dashboard

The Product Listing Quality Dashboard breaks down its insights into several key areas:

1. Content Quality

This section analyzes the quality of your product titles, descriptions, images, and key features. It highlights opportunities to improve the clarity and attractiveness of your listings to better attract and inform potential buyers.

2. Discoverability

Amazon shows how well your products are being found by shoppers. This includes visibility in search results and the effectiveness of your chosen keywords. Making adjustments based on these insights can lead to increased traffic and sales.

3. Customer Satisfaction

Feedback and reviews are crucial for online selling. This section of the dashboard will alert you to any negative trends in customer feedback and offer suggestions to address these issues.

How to Use the Dashboard to Improve Your Listings

Step-by-Step Guide to Enhancing Listing Quality

a. Review Recommendations Regularly

Amazon updates the dashboard regularly with new data and recommendations. Check these suggestions often to stay on top of potential improvements.

b. Enhance Your Product Content

Utilize the dashboard’s feedback to refine your product titles, enhance descriptions with key selling points, and ensure your images are high quality and showcase your products effectively.

c. Optimize for Better Discoverability

Adjust your keywords and use the dashboard’s insights to align your listings more closely with search terms that potential customers are using.

d. Address Customer Feedback Proactively

Respond to customer reviews as recommended by the dashboard, and make product adjustments or description updates to avoid future negative feedback.

Best Practices for Ongoing Listing Optimization

  • Continuous Learning: E-commerce is dynamic, and consumer preferences change. Keep learning about best practices in online selling and listing optimization.
  • Data-Driven Decisions: Base changes to your listings on data from the dashboard combined with your own analytics.
  • Test Changes: Implement changes gradually and measure their impact. This allows you to understand what works best for your products and audience.

Conclusion

Leveraging the Product Listing Quality Dashboard is essential for any Amazon third-party seller focused on long-term success. By systematically improving your listings based on the dashboard’s insights, you can enhance customer experience, increase discoverability, and ultimately drive more sales. Remember, the key to success on Amazon is not just in attracting customers to your listings but converting them through high-quality, compelling content and excellent customer service.

For ongoing success, continue to engage with Amazon’s Seller Central resources and keep abreast of the latest trends and tools available for sellers. By doing so, you can ensure your business not only survives but thrives in the competitive Amazon marketplace.

Unlocking the Power of Amazon Brand Registry for Third-Party Sellers

In today’s competitive e-commerce landscape, establishing and protecting your brand on Amazon is more critical than ever. For third-party sellers, Amazon Brand Registry is a powerful tool designed to give you more control over your product listings and enhance your brand’s presence. This comprehensive guide will explore the benefits of Amazon Brand Registry, how to enroll, and strategic tips for leveraging this service to maximize your success on Amazon.

What is Amazon Brand Registry?

Amazon Brand Registry is a program that helps you protect your registered trademarks on Amazon and create a more trustworthy experience for customers. It provides access to tools that enable you to find and report violations, manage your brand representation, and enhance your listings with rich content.

Benefits of Amazon Brand Registry

  1. Enhanced Brand Protection: Amazon Brand Registry helps in protecting your intellectual property and combating counterfeit products. It offers powerful search tools across various Amazon stores, and proactive brand protections that automatically find and take action against suspected infringements.
  2. Powerful Search and Report Tools: Sellers can search for content using images, keywords, or a list of ASINs in bulk and report potential infringements through a simple, guided workflow.
  3. Exclusive Access to Brand Building Tools: Registered brands can use Enhanced Brand Content, add videos to their listings, and utilize the Amazon Storefronts feature. This enables brands to showcase their products through rich media and customized product pages.
  4. Improved Search and Browsing Experience: Brand Registry helps in improving the accuracy of the Amazon catalog, which makes it easier for customers to find, compare, and purchase products from registered brands.
  5. Access to Brand Analytics: Gain insights with Amazon Brand Analytics, such as search term reports and competitor analysis, which can help in making informed strategic decisions.

How to Enroll in Amazon Brand Registry

Enrolling in Amazon Brand Registry requires a few steps, which are designed to protect the integrity of the program and ensure that it benefits legitimate brand owners.

Eligibility Requirements

  • Active Registered Trademark: You must have an active registered trademark in each country where you wish to enroll. The trademark must be in the form of a text-based mark or an image-based mark with words, letters, or numbers.
  • Amazon Account: You need to have an Amazon Seller or Vendor account.

Steps to Enroll

  1. Sign In to Amazon Brand Registry: Use your Vendor or Seller credentials to sign in.
  2. Enroll Your Brand: Provide your trademark registration number, images of your branded products and packaging, and a list of product categories in which your brand should be listed.
  3. Verification: Amazon will verify your trademark with the respective trademark office. Post-verification, you will need to verify yourself as the rights owner or the authorized agent for the trademark.

Leveraging Brand Registry for Business Growth

Once enrolled, maximize the potential of Brand Registry with these strategic actions:

1. Optimize Product Listings

Use Enhanced Brand Content to improve product descriptions with rich text and images. This can help in increasing conversion rates by providing a better customer experience.

2. Monitor and Protect Your Brand

Regularly use the brand protection tools to monitor and report any infringement. This proactive approach can significantly reduce counterfeit issues and unauthorized sellers.

3. Utilize Brand Analytics

Analyze the performance of your products using Amazon Brand Analytics. This tool provides valuable insights such as search terms, competitor performance, and demographic information of purchasers.

4. Create an Amazon Storefront

Develop an Amazon Storefront to further enhance your brand’s presence. This is a free service for brand owners that provides a customizable space on Amazon to showcase your brand story and product portfolio.

Conclusion

Amazon Brand Registry is a must-have for any serious third-party seller looking to secure and expand their brand presence on Amazon. By protecting your brand, enhancing listing content, and utilizing exclusive insights and tools, you can effectively increase customer trust and drive more sales. As you continue to grow on Amazon, continually adapting and making the most of the resources available through Amazon Brand Registry will be key to your success.

Mastering Amazon Listing Translations for International Markets

Expanding your Amazon business to international markets is an exciting step, but it requires more than just straightforward translations of your product listings. Effective localization adapts your content to meet the cultural, linguistic, and shopping preferences of each target market. This comprehensive guide provides third-party sellers with essential strategies, tools, and tips to successfully translate and localize Amazon product listings for global audiences.

Why Localization Matters

When you decide to sell internationally, simply translating text word-for-word from one language to another is often not enough. Localization involves adapting your product descriptions, images, and other content to resonate with local consumers, taking into account cultural nuances, local regulations, and market-specific behavior.

Benefits of Effective Localization

  • Increased Sales: Properly localized listings are more likely to attract and convert customers in new markets.
  • Enhanced Customer Trust: Listings that reflect an understanding of local language and culture build credibility and trust.
  • Reduced Return Rates: Clear, culturally relevant product descriptions help ensure customers know exactly what they’re buying.

Key Steps in Localizing Your Amazon Listings

1. Research Your Target Markets

Before you start translating, understand the cultural context of your target market. This includes common purchasing habits, preferences, and taboos. Tools like Google Trends and local market research reports can provide valuable insights.

2. Hire Professional Translation Services

While automated translation tools like Google Translate are improving, they still lack the nuance necessary for effective marketing content. Hiring professional translators with e-commerce experience can ensure that your listings are both linguistically and culturally accurate. Websites like Upwork or Fiverr offer access to freelance translators with specialized skills.

3. Optimize for Local SEO

Keywords that work well in one language may not be effective in another. Conduct keyword research using tools like SEMrush or Ahrefs to identify what potential customers in your target markets are searching for. Incorporate these keywords naturally into your translated content.

4. Cultural Adaptation

Adapt your content to align with local norms and expectations. This might mean changing your product images to feature local models, altering colors to avoid cultural missteps, or modifying your product names to be more appealing or appropriate in the target language.

5. Legal and Regulatory Compliance

Ensure your product meets local regulations and that your listings comply with legal requirements in each market. This includes adapting returns policies, warranty information, and safety instructions to local laws.

6. Use Local Units of Measure and Currency

Convert sizes, dimensions, and currencies to local units to aid comprehension and reduce friction in the purchasing process.

Tools and Technologies for Localization

  • Translation Management Systems (TMS) like SDL Trados or MemoQ can help manage translation workflows and maintain consistency across all translated content.
  • Amazon’s Build International Listings (BIL) tool can automate the process of listing your products on multiple Amazon marketplaces, helping you manage offers and synchronize pricing across different countries.
  • Cultural Consultancy Services can review your listings to ensure they are culturally sensitive and appropriate.

Monitoring and Optimizing Your International Listings

After your listings go live, continuous monitoring and optimization are crucial. Use Amazon’s detailed reporting tools to track the performance of your localized listings. Pay attention to customer feedback and reviews, as they can provide direct insights into how your products are being received by local audiences.

Conclusion

Translating and localizing your Amazon listings for international markets requires careful planning, cultural understanding, and ongoing optimization. By leveraging professional translation services, understanding local market dynamics, and continuously adapting your approach based on performance data, you can significantly increase your chances of success in global markets.

Expanding internationally is not just about making your products available in new languages; it’s about making them resonate with new audiences. With the right approach, you can ensure your international expansion is not only successful but also sustainable.

Optimizing Your Amazon Listings: How Third-Party Sellers Can Monitor Performance Effectively

In the ever-expanding marketplace of Amazon, third-party sellers face the constant challenge of understanding and optimizing the performance of their product listings. With millions of transactions occurring daily, it’s essential to utilize the right tools and strategies to monitor your listings’ performance. This comprehensive guide will walk you through the best practices and tools available to keep your Amazon business competitive and profitable.

Understanding Key Performance Indicators (KPIs)

Before diving into the various tools and methods to track performance, it’s crucial to understand the Key Performance Indicators (KPIs) that matter most on Amazon:

1. Sales and Revenue

This is the ultimate measure of success. Monitoring daily, weekly, and monthly sales volumes and revenue can help you gauge the overall health of your business.

2. Conversion Rates

The percentage of visitors who buy your product after viewing your listing. A low conversion rate might indicate issues with your listing quality or price competitiveness.

3. Traffic Metrics

Includes page views and unique visitors. Understanding traffic patterns can help you optimize your marketing efforts and listing visibility.

4. Buy Box Win Percentage

For sellers in competitive categories, winning the Buy Box is crucial for driving sales. Monitoring this metric helps understand how often your listing is the default choice when customers click the “Add to Cart” button.

5. Customer Feedback and Reviews

Ratings and reviews not only influence buyer decisions but also affect your listings’ rankings. Monitoring these can provide insights into customer satisfaction and potential areas for product improvement.

Tools for Monitoring Amazon Listing Performance

Leveraging the right tools can make the process of monitoring and optimizing your listings more efficient. Here are some essential tools every Amazon seller should consider:

1. Amazon Seller Central

The built-in analytics tools provided by Amazon give you direct insights into your sales, traffic, and operational metrics. The dashboard is great for quick checks and basic analysis.

2. Helium 10

A comprehensive suite of tools that offers detailed analytics on your and your competitors’ listings. Features like keyword tracker, sales estimator, and inventory level monitoring can provide invaluable insights.

3. Jungle Scout

Ideal for both product research and ongoing performance tracking. Jungle Scout offers detailed data on market trends, competitor analysis, and can help identify high-performing keywords.

4. Keepa

A tool that tracks price changes and sales rank over time across multiple Amazon regions. This can be particularly useful for understanding pricing strategies and seasonal fluctuations.

Best Practices for Monitoring and Improving Listing Performance

To effectively use the data these tools provide, consider the following best practices:

1. Regular Audits

Conduct regular audits of your listings to check for any discrepancies in inventory, pricing, or content that could impact performance.

2. A/B Testing

Experiment with different aspects of your listing such as images, bullet points, and pricing. Tools like Splitly can automate this process and provide clear analytics on what changes improve performance.

3. Optimize Based on Trends

Use trend data from tools like Google Trends or Seasonality in Helium 10 to anticipate changes in consumer demand and adjust your listings accordingly.

4. Engage with Customer Feedback

Regularly review customer feedback and reviews to address any recurring issues or concerns. This not only helps improve product quality but also boosts customer satisfaction and loyalty.

5. Invest in Professional Images and SEO

High-quality images and well-optimized product titles and descriptions can significantly boost traffic and conversion rates. Consider professional photography and SEO services if necessary.

Conclusion

Monitoring and optimizing product listing performance on Amazon requires a blend of analytical prowess and strategic execution. By understanding the key metrics, utilizing the right tools, and continuously adapting to feedback and trends, third-party sellers can significantly enhance their visibility, customer satisfaction, and sales on Amazon. Remember, the goal is not just to sell but to build a sustainable and thriving business in one of the world’s most competitive online marketplaces.

Mastering Competitor Analysis on Amazon: A Guide for Third-Party Sellers

In the vast and competitive landscape of Amazon, understanding how to effectively research and analyze competitor listings is crucial for any third-party seller aiming to thrive. This comprehensive guide will walk you through the essentials of competitor analysis on Amazon, providing you with strategies, tools, and insights needed to gain a competitive edge.

Why Competitor Analysis Is Crucial on Amazon

Competitor analysis on Amazon isn’t just about keeping tabs on your rivals; it’s a strategic approach to gather actionable insights that can inform your pricing, marketing, product development, and customer service strategies. By understanding your competitors’ strengths and weaknesses, you can better position your products to capture more market share.

Understanding the Competition

Before diving into the specifics, it’s important to identify who your real competitors are. Look for other sellers who:

  • Target similar customer segments
  • Offer similar products
  • Operate within the same price range

Tools for Effective Competitor Research

Several tools can enhance your ability to research competitors on Amazon. Here’s a rundown of some of the most effective ones:

1. Helium 10

Helium 10 offers a suite of tools that includes everything from keyword research to product and competitor tracking. Their Black Box and Xray tools, for example, can help you uncover profitable products and understand the competitive landscape of specific niches.

2. Jungle Scout

Jungle Scout provides detailed data on products across Amazon, including sales estimates, revenue, and more. Their Product Tracker feature allows you to monitor competitors’ inventory and sales performance.

3. Keepa

Keepa is renowned for its comprehensive price tracking capabilities. It allows you to monitor price changes and sales rank over time, giving insights into competitors’ pricing strategies and stock levels.

Key Metrics to Monitor

When analyzing competitor listings, focus on the following metrics:

1. Pricing Strategies

Understanding how competitors price their products can provide insights into market expectations and elasticity. Monitor any changes in pricing and promotional activities to gauge how competitors are positioning themselves.

2. Sales Performance

Sales rank and estimated monthly sales data can help you understand how well competitors’ products are performing. This insight is invaluable for assessing market demand and the effectiveness of competitors’ marketing strategies.

3. Customer Reviews and Ratings

Analyzing competitors’ customer feedback can reveal strengths and weaknesses in their products and services. Look for common complaints and areas where your product can offer improvements.

4. Listing Quality

Evaluate the quality of competitors’ product listings by examining their use of keywords, the effectiveness of their product descriptions, and the quality of their images and videos. High-quality listings are often correlated with higher conversion rates.

Analyzing Listing Details

Dive deep into each competitor’s product listing to understand:

  • Title Optimization: How well are they using keywords in their titles?
  • Feature Bullets: Are they effectively highlighting the product’s key features?
  • Product Descriptions: Do they provide comprehensive and SEO-friendly product descriptions?
  • Visuals: How are they leveraging images and videos to enhance the listing?

Strategic Insights from Competitor Analysis

From your analysis, derive strategies to:

  • Differentiate Your Products: Identify gaps in the market that competitors are not addressing. Customize your product features or create bundle offers to fill these gaps.
  • Optimize Your Listings: Use keywords that competitors might have missed, provide clearer images, or more detailed descriptions to enhance your listing quality.
  • Adjust Your Pricing: If competitors are undercutting your prices, consider whether you can offer additional value to justify a higher price point, or find ways to streamline your operations to offer competitive pricing.

Conclusion

Effective competitor analysis on Amazon is about continuously gathering data and insights to stay ahead of the curve. By leveraging the right tools and focusing on key metrics and listing details, you can make informed decisions that boost your visibility, improve customer satisfaction, and ultimately, increase your sales. Remember, the goal is not just to compete but to outperform your competitors by being smarter in your strategic approach.

By regularly engaging in detailed competitor analysis, you empower your business with the knowledge to anticipate market trends, adapt to changes quickly, and cater to your customers’ evolving needs more effectively. This proactive approach is what will set your Amazon store apart from the competition.